Moonlander Support
Please read through our Guide below to getting started with the Moonlander 2, if you still have additional questions visit our support forum here

Please read through our Guide below to getting started with the Moonlander 2, if you still have additional questions visit our support forum here

You need to download two sets of software before you can start using your Moonlander. First visit Silicon Labs below to download the USB driver our software uses to communicate with your Moonlander, and follow their instructions to install the driver to your system
Next download our mining software which controls your Moonlander, and enables it to mine to your pool. Please visit our GitHub release page below that hosts our software, and click on the download link for your particular system.
If you are new to mining, you need to sign up for a pool so you can start earning some Litecoins! Since it is now very hard to find blocks on your own, pools aggregate hash power and once someone in the pool finds a block, those rewards are all split depending on your hashpower contribution. A good starting pool for the Moonlander 2 is Litecoinpool.org. Follow the instructions to create an account and create a "worker" that has a unique username and password you will need in the next step.
Once you have your pool URL, and worker name, open the futurebit bfgminer software folder you downloaded above and edit the "start-moonlander" file with a text editor (note the example below will look different for windows ".bat" file, but you are editing the same values).

In the highlighted red box above enter your specific pool URL, in the green box enter your worker username, and in the yellow box enter your worker password (this usually does not matter for most pools). Save the file and you are almost ready to start mining!
Plug in your Moonlander 2 to a USB 2 or 3 port on your computer (USB 3 ports are best since they provide the most power). You should see a green light on the Moonlander indicating everything is ready to go. Simply double click the "start-moonlander" file you edited above to launch our software and start mining!
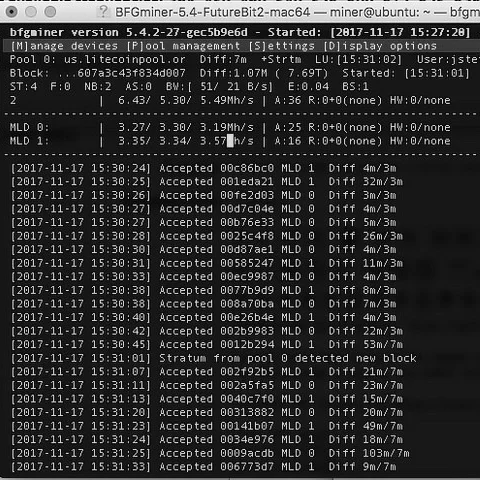
Thats it! You should now see yellow and red blinking leds on the Moonlander indicating that it is now mining successfully to your pool. You should also see a window similar to the one on the left. Each "Accepted" line means your Moonlander has found a share and submitted it to your pool.
Happy Mining!
For more info, and to learn more about your Moonlander and additional information on how to fine tune it and increase its clock rate please visit our forum thread below.
